You want to start streaming, but you’re stuck. You look at your favorite Twitch streamers or YouTubers and see setups that look like they cost more than a car. You look at your own bedroom—a messy desk, bad lighting, and a pile of laundry in the corner—and you feel discouraged.
Here is the good news: You don’t need a $10,000 budget to look like a pro. You just need a Smart Plan.
Most people make the mistake of buying a powerful PC and forgetting everything else. But streaming is a visual and audio medium. If your room looks chaotic and your audio echoes, viewers will leave.
In this guide, we are going to deploy the “Pro-Streamer Bedroom Plan.” We will break your room down into 4 Essential Zones using high-value, budget-friendly gear available on Amazon.
Let’s design your space.
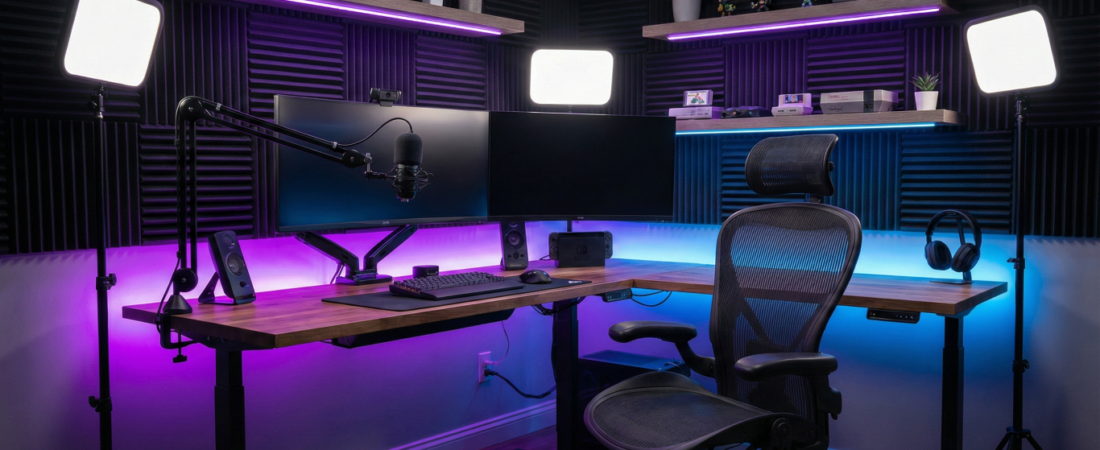
Zone 1: The Command Center (The Foundation)
Before we talk about tech, we need to talk about furniture. This is where you will be spending hours grinding ranked matches or editing videos.
The Desk: Go L-Shaped
If you are in a bedroom, space is likely limited. The smartest move is an L-Shaped Desk. It maximizes corner space that usually goes to waste. It separates your “Gaming/Streaming” area from your “School/Work” area, or simply gives you room to put your PC tower on the desk without cramping your mouse hand.
- Top Pick: Look for desks with a monitor shelf to improve ergonomics.
- Recommended:


The Throne: Mesh Over Leather
Gaming chairs look cool, but cheap “racing style” leather chairs often peel and trap heat. For a smart room plan, we prioritize Mesh Ergonomic Chairs. They keep you cool during intense moments and provide better back support for long streams.
- Recommended

💡 Pro Tip: Get your monitors off the desk! Use a Dual Monitor Stand. It costs less than $40 and instantly makes your setup look 10x cleaner.
Zone 2: The Visuals (Lighting & Camera)
You don’t need a $1,000 DSLR camera yet. The secret to a “Pro” look isn’t the camera; it’s the lighting. A cheap webcam with great light looks better than an expensive camera with bad light.
The Lighting Rule: Turn Off the Ceiling Light
Ceiling lights cast ugly shadows under your eyes (the “raccoon” look). You need Key Lights—soft lights that face you directly.
- The Setup: Place two LED panels on the left and right side of your monitor.
- Recommended: Neewer 2-Pack Dimmable 5600K USB LED Video Lights
The Camera
If you are just starting, a solid 1080p/60fps webcam is perfect. Look for one with decent autofocus.
- Recommended: Logitech StreamCam or Razer Kiyo
Zone 3: The Audio (Crisp & Clear)
Viewers might forgive grainy video, but they will click away instantly if your audio is bad.
The Mic & Boom Arm
Do not use the microphone built into your headset; it sounds muffled. Get a USB Condenser Microphone.
Crucially, do not leave it on the desk stand. Every time you type or bang the table, the mic will pick it up. You need a Boom Arm to float the mic near your mouth.
- The Mic: HyperX QuadCast S or Blue Yeti
- The Arm: InnoGear Microphone Arm Stand
Acoustic Treatment
Does your room sound empty and echoey? That’s because sound is bouncing off your bare walls. You don’t need to cover the whole room, just place some Acoustic Foam Panels behind your monitor and on the wall behind you.
Zone 4: The Vibe (Background & Decor)
This is what sets you apart. Your background is your stage. It tells the viewer who you are.
RGB Lighting
It wouldn’t be a gamer room plan without RGB. However, be subtle. Place LED strips behind your desk for a glow, or use a smart lamp in the corner.
- Recommended: Govee Smart LED Strip Lights
Personality Shelves
Don’t stream against a blank white wall. Install a simple floating shelf visible in your camera frame. Put a Funko Pop, a fake plant, or a retro console on it. It adds depth and gives chat something to talk about.
- Recommended: Wallniture Floating Shelves + Artificial Potted Plants
The Budget Breakdown
Here is the estimated cost to build this entire plan using high-value Amazon items (prices may vary):
| Zone | Item | Est. Price |
| Zone 1 | L-Shaped Desk + Monitor Arm | $140 |
| Zone 1 | Ergonomic Mesh Chair | $120 |
| Zone 2 | LED Light Kit (2-pack) | $50 |
| Zone 3 | USB Mic + Boom Arm | $110 |
| Zone 4 | RGB Strips + Decor | $40 |
| Total Upgrade Cost | ~$460 |
Conclusion: Start Creating
You don’t need to buy everything on this list at once. Start with Zone 3 (Audio) and Zone 2 (Lighting), as these make the biggest immediate difference to your stream quality.
The most important part of the Smart Room Plan isn’t the gear—it’s getting started. Design your space today, and hit that “Go Live” button.
Ready to build your setup? Check out the full collection on Amazon below.